- All
- Product Name
- Product Keyword
- Product Model
- Product Summary
- Product Description
- Multi Field Search
Please Choose Your Language

Views: 0 Author: Site Editor Publish Time: 2026-09-24 Origin: Site


Transitioning from bodyweight calisthenics to weighted movements is the most effective path to progressive overload. However, this shift introduces new biomechanical risks. Improperly loading your equipment can lead to lumbar strain, bruised hips, or sudden hardware failure mid-lift. You must secure the load properly to prevent unnecessary stress on your joints.
A systematic approach to wearing, loading, and executing movements ensures safety while maximizing hypertrophic and strength gains. Proper mechanics will dictate your long-term progress. We will explore safe practices and identify common failure points so you can lift confidently.
The purpose of this guide is to provide an evidence-based, step-by-step framework. You will learn exactly how to use a dip belt correctly. We will also help you evaluate hardware quality before investing your time and money.
Placement is Critical: The belt must rest on the upper glutes/lower back junction, not the true waist, to prevent spinal compression.
Load Management: Master the "loop and cinch" technique with your dip belt with chain to keep plates secure and eliminate dangerous swinging.
Exercise Versatility: Beyond standard dips and pull-ups, high-quality belts unlock variations like belt squats and calf raises.
Procurement Standards: When evaluating a weighted dip belt, prioritize load ratings, stitching patterns, and chain durability—factors especially critical if sourcing from a commercial dip belt supplier.
Mastering the setup process forms the foundation of safe weighted training. A poorly positioned belt alters your center of gravity and places inappropriate torque on your lumbar spine. Follow these distinct steps to secure your load correctly before stepping onto a platform.
Wrap the wide back-support section directly over your sacrum and upper glutes. This placement anchors the equipment solidly against your bony pelvic structure. Avoid high-waist placement at all costs. The weight should pull downward from the hips, never from the lower spine. Placing the pad too high compresses your lumbar discs and restricts diaphragmatic breathing. By securing it lower on the hips, you utilize your body's natural structural support.
Feed the attachment mechanism through the D-ring located on the opposite side. This action creates a secure, self-tightening loop around your hips. We call this the cinch effect. When using a sturdy dip belt with chain, this loop mechanism ensures the equipment hugs your body tightly once loaded. It prevents slipping during explosive upward movements. Make sure the links do not twist during this step, as twisted metal can bind and damage the D-ring stitching.
Pass the loose end through the center hole of your weight plates or the handle of a kettlebell. Connect the carabiner back to the starting D-ring or an adjacent chain link. Ensure the weight hangs centrally between your legs. A central hanging position distributes the downward force evenly across both hips. If you attach the carabiner too far to one side, the asymmetrical pull will misalign your pelvis during the exercise.
Perform a slow, staggered stance stand-up to test the load balance. Do this before approaching the pull-up bar or dip station. By standing up slowly, you allow the cinch mechanism to tighten fully. You also verify the carabiner has closed securely. This risk mitigation step reveals any structural issues while your feet remain safely on the floor. Never skip this test when attempting personal records.
Adding weight fundamentally changes the mechanics of standard bodyweight exercises. You must adapt your posture and movement cadence to accommodate the new load vector. Precision yields better muscle engagement and reduces joint shear.
Maintain a slight forward lean to target the lower pectorals. This posture simultaneously reduces anterior shoulder strain. Keeping your torso perfectly vertical forces the shoulder capsule to absorb excessive stress at the bottom of the movement. By leaning forward, you recruit the stronger chest musculature.
Sway control dictates your success here. Cross your ankles slightly behind the hanging weight. This leg position locks the plates in place and prevents pendulum momentum. If the plates begin to swing, they will throw off your pressing trajectory. A rigid lower body translates to a more powerful, stable press.
Using a dip belt for pull ups requires a stable stepping platform. Do not jump to the bar when you have heavy iron attached to your waist. Jumping causes the plates to aggressively yank your lower back upon catching the bar. Use a plyometric box to reach the bar calmly.
Initiate the pull via scapular depression. Keep your core braced tightly. Bracing prevents the lower back from hyperextending as gravity pulls the iron downward. Your lats demand strict form to grow. A dedicated weighted pull up belt often features shorter chains. Shorter lengths keep the mass closer to your center of gravity, reducing awkward swinging during the ascent.
Expanding utility beyond upper body training maximizes your equipment return on investment. Lifters often overlook the versatility of this simple tool. You can target lower body musculature safely and effectively by repurposing your gear.
Stand on two plyometric boxes. Let the weight hang directly between your legs. Squat down until your thighs break parallel. This variation delivers intense quadriceps hypertrophy without imposing axial loading on the spine. It serves as an ideal alternative for lifters managing back injuries. Traditional barbell squats compress the spine, whereas this method pulls traction through the hips. You achieve maximal leg stimulation while giving your lumbar discs a rest.
Attach the front D-ring to a low cable pulley system. Step forward and execute glute pull-throughs. The hip-hinge movement heavily stimulates the hamstrings and glutes without straining the lower back. Alternatively, load heavy plates and stand on a calf block for standing calf raises. This setup entirely frees up your hands and shoulders. You no longer need to balance a heavy barbell across your upper back or grip heavy dumbbells until your forearms fail.
Alternative Training Applications
Exercise Variation | Primary Muscle Targeted | Required Setup Equipment |
|---|---|---|
Belt Squat | Quadriceps / Glutes | Two stable plyo boxes |
Glute Pull-Through | Hamstrings / Glutes | Low cable pulley machine |
Standing Calf Raise | Gastrocnemius / Soleus | Elevated step or calf block |
Hip Marching | Hip Flexors | Light kettlebells |
Even advanced athletes fall victim to technical errors when chasing heavier numbers. Recognizing and correcting these biomechanical and equipment faults will keep you out of the rehabilitation clinic.
Allowing the weight to swing during the eccentric phase ruins movement efficiency. This pendulum effect bleeds momentum and creates dangerous shear forces across the joints. You must control the negative portion of every repetition. Stop the descent briefly if you feel the plates shifting. If leg clearance becomes an issue, use kettlebells instead of wide olympic plates. Kettlebells possess a much smaller footprint, reducing the chance they bump your inner thighs and initiate a swing.
Trusting stock carabiners on cheap setups causes catastrophic failures. Many lifters load 100+ pounds onto flimsy clips designed for light resistance bands. You must visually inspect the D-ring stitching before every heavy session. Swap out low-grade, generic clips for climbing-rated steel carabiners. A carabiner snapping mid-rep can cause serious muscle tears as the sudden loss of tension jerks your body upward.
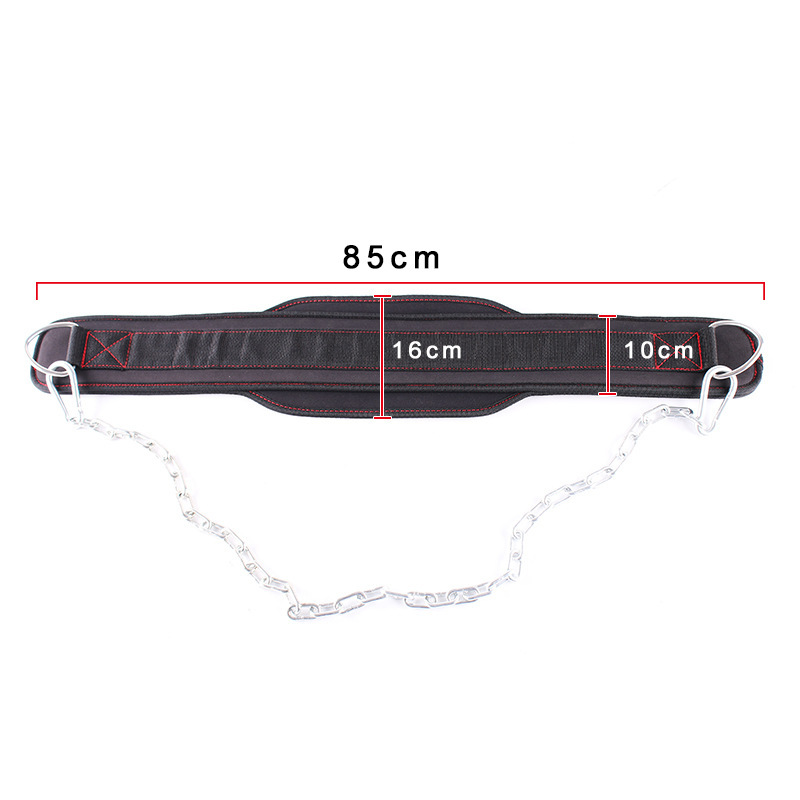
Wearing thin clothing under narrow, unpadded nylon causes painful friction burns. Heavy loads concentrate immense pressure across a very small surface area. Ensure your gear features a wide neoprene or leather back pad. Look for a minimum width of 6 inches. A wider surface area distributes pressure evenly across the pelvic bones, eliminating pinching and skin abrasions.
Not all training accessories are manufactured equally. Understanding material science and hardware specifications helps you select equipment capable of surviving years of abuse.
Leather offers maximum durability. It breaks in slowly over time, molding to your specific hip shape. Powerlifters pushing extreme weights heavily favor genuine leather. Nylon and neoprene blend options feel lightweight and comfortable immediately out of the box. They suit high-repetition calisthenics athletes perfectly. They resist sweat absorption better than leather and usually feature breathable mesh linings.
Look for heavy-duty steel chains. The ideal length typically spans 30 to 36 inches. This length accommodates multiple large plates while remaining short enough to avoid dragging on the floor. Inspect the stitching around the D-rings. You want to see reinforced box X-stitching. Single-line stitching will eventually unravel under tension. A true weighted dip belt must feature these structural reinforcements to earn your trust.
Gym owners outfitting a facility face unique procurement challenges. When purchasing in bulk or developing a private label line, you must partner with a verified dip belt supplier. Reputable suppliers provide independent load-testing certificates to guarantee safety. If you pursue options for a custom dip belt, focus on custom embroidery and colorways. Ensure these aesthetic modifications do not compromise the structural integrity of the heavy-duty back pad.
Proper utilization of this equipment transforms standard bodyweight exercises into highly scalable strength builders. Success relies entirely on precise placement, controlled movement execution, and avoiding hazardous momentum. You must respect the weight and prioritize stability over ego-lifting.
Audit your current training routine to see where weighted progressive overload makes sense. Evaluate your equipment against commercial load-bearing standards before adding heavy plates. By selecting robust materials and executing strict form, you will safely push your upper and lower body strength to new levels.
A: Cheap consumer belts typically hold around 150 lbs before the stitching or carabiners risk failure. Commercial-grade options, built from heavy leather or reinforced nylon with box X-stitching, safely support 300+ lbs. Always check the manufacturer's load-testing certificates.
A: Kettlebells provide distinct biomechanical advantages because their compact shape keeps the center of gravity tight and prevents thigh chafing. Plates offer superior micro-loading capabilities for precise progression. Dumbbells are generally awkward to load safely.
A: Chains offer unmatched durability and a high load capacity, making them ideal for heavy lifting. Nylon straps provide quiet operation, reduce scratching on expensive gym plates, and generally feel smoother against the skin during setup.
A: Yes, if worn incorrectly. High-waist placement compresses the lumbar spine and causes strain. Correct placement resting low on the hips and upper glutes directs the load safely through the pelvis, preventing lower back injury.
