- All
- Product Name
- Product Keyword
- Product Model
- Product Summary
- Product Description
- Multi Field Search
Please Choose Your Language

Views: 0 Author: Site Editor Publish Time: 2026-09-26 Origin: Site


Many lifters treat their gym gear like passive medical braces. This mindset severely limits potential. A quality belt acts as a powerful performance multiplier. It elevates your overall strength ceiling. Wearing it incorrectly neutralizes these benefits entirely. Poor placement disrupts your lifting mechanics. Improper tension compromises spinal stability under heavy loads. Learning how to wear a weightlifting belt correctly is essential. Serious training demands precise execution. You must establish the exact anatomical placement for your body type. You also need the right tension level. Proper bracing techniques maximize intra-abdominal pressure. They do this while preserving your mobility. This guide breaks down evidence-based positioning strategies. We cover tightness protocols in detail. You will also learn how to evaluate material rigidity based on your specific lifting demands.
Optimal belt position typically sits directly over the belly button, between the iliac crest (top of the pelvis) and the lowest rib.
A belt should be tight enough to provide a rigid wall for your core to expand against, but loose enough to allow a full, 360-degree diaphragmatic breath (the "one-finger rule").
Squats and deadlifts often require slight positional adjustments to prevent pinching at the bottom of the movement.
Material rigidity dictates bracing feedback; investing in a high-quality leather lifting belt from a reputable powerlifting belt supplier ensures consistent pressure and long-term durability.
Every lifter must understand the underlying biomechanics of core bracing. The primary function of a belt is to increase intra-abdominal pressure. We often abbreviate this as IAP. Increased IAP stabilizes the human spine. It creates a rigid cylinder protecting your vertebrae during heavy compound lifts.
Many beginners misunderstand this mechanism entirely. They assume the equipment acts like a corset. They pull it incredibly tight to squeeze their waist inward. This approach guarantees failure. The core must actively push outward against the equipment. We call this the "Wall" concept. The belt provides an unyielding barrier. Your abdominal muscles contract and press into this barrier. This physical feedback loop magnifies your natural bracing power.
To implement this, you use the Valsalva maneuver. You take a deep diaphragmatic breath. You trap the air in your stomach. Your belly expands in a 360-degree radius. You push laterally, anteriorly, and posteriorly. The equipment simply gives these expanding muscles something hard to push against. If you rely on the fabric to squeeze your torso passively, you lose structural integrity.
How do we measure success? Effective use yields clear, measurable improvements. You should experience a noticeable increase in bar speed. Your ascent out of the "hole" in a squat becomes significantly more stable. Your hips and chest rise simultaneously. You will notice less energy leaking through a soft midline. If your lifts feel sloppy, you are failing to utilize the performance baseline correctly.
Anatomical variance dictates where gear sits on your torso. Short torsos require different strategies than long torsos. A flawless weightlifting belt position balances mobility and maximum coverage.
Most athletes find success using standard anatomical landmarks. The goal is to cover the abdominal cavity. You want to avoid bone-on-bone contact. Follow these steps to find the neutral baseline:
Stand up straight in a relaxed posture.
Locate the top of your hip bone. Anatomists call this the iliac crest.
Find your lowest floating rib.
Place the equipment horizontally in the fleshy gap between these two bony points.
Center the buckle directly across your abdomen. It usually intersects the navel.
This neutral zone offers the most room for abdominal expansion. It provides complete support to the lumbar spine. However, static placement rarely survives dynamic movement perfectly. You must adapt based on the specific exercise.
Deep squats demand extreme hip flexion. Your thighs travel upward toward your stomach. A low-riding buckle will bite painfully into your upper thighs at the bottom of the lift. Lifters often wear the gear slightly higher during squats. You move it up perhaps half an inch. This slight elevation creates clearance for the hips. It ensures you hit maximum depth without uncomfortable pinching.
Deadlifts present a completely different biomechanical challenge. The starting wedge requires you to hinge at the hips aggressively. A high-riding buckle can choke you or restrict breathing. It can also block you from setting your lower back into a rigid arch. For deadlifts, athletes often wear it slightly lower. Some lifters angle the belt upward at the front. The back sits low on the lumbar spine. The front angles up over the belly button. This angle accommodates the bent-over starting position perfectly.
Extreme placements create significant hazards. Placing the gear entirely on the lumbar spine sits too low. It provides zero anterior support. Your stomach has nothing to push against. Conversely, placing it directly on the ribs sits too high. This diminishes core expansion capacity. It also causes severe bruising on the floating ribs. You must find the middle ground for your specific body structure.
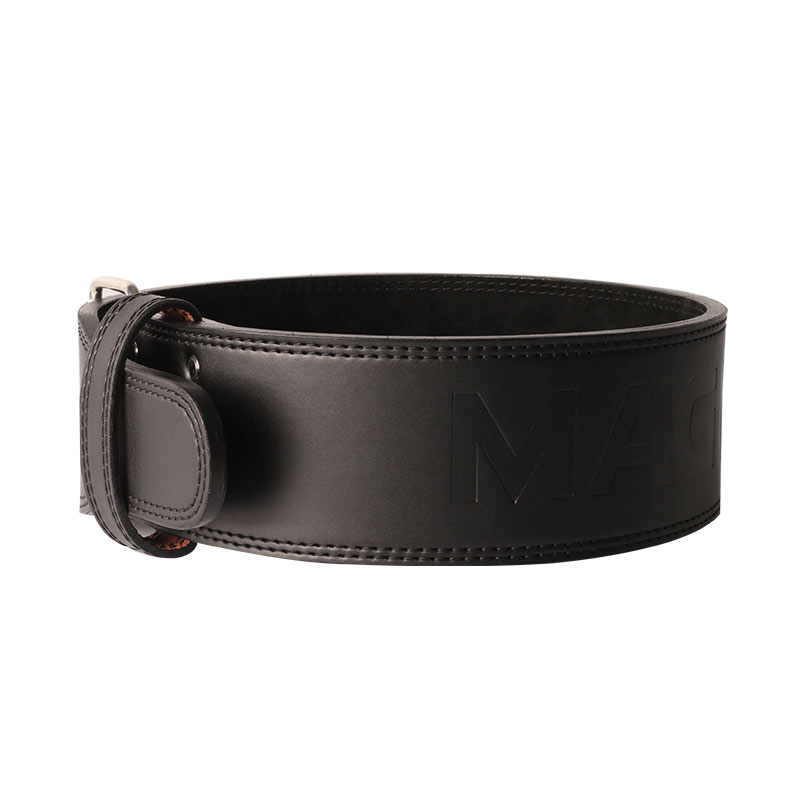
Finding the correct tension is a delicate balancing act. Knowing exactly how tight should a lifting belt be requires trial and error. If it sits too loose, you generate zero intra-abdominal pressure. If it sits too tight, you cannot draw enough air into your lungs. Both extremes ruin your performance.
The industry relies on a simple testing protocol. We call it the one-finger rule. It provides a reliable baseline for lifting belt fit before you ever touch a barbell.
Fasten the buckle while standing normally.
Do not suck your stomach in. Do not push your stomach out.
Take your index finger. Attempt to slide it tightly between your stomach and the inner suede.
The finger should slide in with moderate resistance.
If you cannot fit a finger, the tension is too high. It restricts diaphragmatic breathing. You will struggle to brace properly. If you can easily fit your whole hand inside, the tension is too low. It lacks the resistance necessary to generate IAP. You must adjust the sizing incrementally.
Static testing is only step one. Dynamic testing confirms the fit. Stand near a mirror. Inhale deeply into your stomach. Focus on avoiding chest expansion. Your shoulders should not rise. Your belly should forcefully expand outward. If the gear pinches painfully during this breath, loosen it by one notch. If it forces air upward into your chest cavity, it is constricting your diaphragm. You must back off the tension.
Waist circumferences fluctuate daily. Hydration levels change. Heavy meals alter your stomach size. Bloating occurs naturally. Lifters need a fastening system accommodating these micro-adjustments. A fit feeling perfect on Monday might feel suffocating on Friday. You must remain flexible on the platform. Never blindly use the same notch without verifying the one-finger rule during your warm-ups.
Biomechanical knowledge means nothing without appropriate hardware. You cannot brace effectively against flimsy material. Evaluating material rigidity and fastening mechanisms ensures long-term success.
Nylon vs. Leather: Nylon models offer exceptional mobility. Athletes favor them for functional fitness and high-repetition WODs. They transition smoothly between weightlifting and gymnastics. However, nylon lacks absolute rigidity. It bends under extreme pressure. A leather lifting belt solves this problem. It provides an unyielding surface area. This rigidity is absolutely necessary for elite-level bracing during maximal absolute strength attempts.
Prong vs. Lever: The fastening mechanism dictates your daily user experience. Single-prong designs offer reliable, easy adjustment. They adapt instantly to fluctuating waistlines. You simply choose a different hole. Lever designs provide rapid locking. They guarantee maximum tightness with a simple flick of the wrist. However, lever models require a screwdriver to adjust the internal sizing block. If you bloat mid-workout, adjusting a lever takes time.
Table 1: Lifting Belt Material and Fastening Comparison
Feature | Nylon / Velcro | Single-Prong Leather | Lever Leather |
|---|---|---|---|
Primary Use Case | Cross-training, Olympic lifting | Powerlifting, Heavy Strength Training | Competitive Powerlifting |
Rigidity Level | Low to Moderate | High | Maximum |
Adjustment Speed | Instant (Velcro) | Fast (Buckle) | Slow (Requires Tool) |
Durability | 1-3 Years (Velcro wears out) | 10+ Years | 10+ Years (Hardware dependent) |
Where you buy matters immensely. Generic sporting goods brands use cheap filler materials. They sandwich cardboard between thin layers of suede. These fail quickly under heavy loads. You should prioritize a dedicated powerlifting belt supplier. Specialized suppliers understand the biomechanical demands of heavy training. Ordering a custom lifting belt ensures the product matches your specific torso length. You can specify the exact width and hardware type required for your competitive needs.
Be honest about your training needs. Manufacturers typically offer 10mm and 13mm thickness options. A 13mm model requires a painfully long break-in period. It feels like wearing cast iron. It restricts mobility heavily. A 13mm option is generally overkill for casual lifters. The 10mm thickness remains the industry standard. It supports 90% of athletes perfectly. It breaks in faster while providing exceptional IAP support.
Even optimal gear requires troubleshooting. Lifters often encounter common implementation errors. Addressing these issues quickly prevents injury. It also prevents bad habits from forming.
Solution: The gear is pinching bony landmarks during flexion. Adjust the placement vertically by half an inch. Check for excessive tightness. If you still bruise, evaluate your torso length. Shorter athletes often struggle with standard 4-inch widths. A 3-inch model provides the exact same IAP benefits for shorter torsos. It clears the hips and ribs perfectly.
Solution: The equipment is likely too loose. Alternatively, the lifter is breathing incorrectly. Chest breathing negates the core support completely. You must recalibrate the Valsalva maneuver. Push laterally against the leather. The gear does not protect your back passively. Your abdominal pressure protects your back. The leather simply facilitates that pressure.
Solution: You must audit your hardware immediately. Cheap lever mechanisms use weak zinc alloys. They fail violently under extreme intra-abdominal pressure. This causes sudden catastrophic loss of core stability mid-squat. Ensure the supplier guarantees the hardware against structural failure. Upgrade to cast iron or steel lever mechanisms. Single-prong designs rarely suffer from this specific failure mode.
Correct positioning and tightness transform a belt from an accessory into a critical piece of biomechanical equipment. It serves as a rigid wall for your core. Understanding the nuances of placement ensures you maximize intra-abdominal pressure without sacrificing critical mobility.
Audit your current fit during your very next warm-up set. Apply the one-finger rule to establish a proper tension baseline. Practice deep diaphragmatic breathing into the stomach rather than the chest. If your current gear bends, folds, or lacks the rigidity to support heavy loads, it is time to upgrade. Evaluate your sizing and material options thoroughly. Transitioning to a high-quality leather or custom solution will permanently elevate your strength ceiling and keep your spine protected.
A: No. Reserve it for heavy compound lifts like squats, deadlifts, and overhead presses. You should only use it when lifting at 70% of your one-rep max or higher. Lifting belt-less during lighter sets ensures natural core strength development. It prevents over-reliance on external bracing.
A: No. EMG studies show that wearing a belt correctly actually increases the activation of the abdominal muscles. It gives your core a hard surface to contract against. This active pushing stimulates the abdominal wall heavily, building core strength safely under maximal loads.
A: A high-quality 10mm or 13mm leather belt typically takes 2 to 4 weeks of consistent use to mold to your specific body shape. You can speed up this process by tightly rolling it in opposite directions between training sessions to soften the rigid fibers.
